
Wrap an existing JAR file into a plug-in
Have you ever wanted a smooth way of deploying existing Java code in the form of JAR files to your own code? You can manually copy these files into the Java runtime environment on your servers and clients - however, this approach quickly gets messy. Why not use the existing functionality available to do this? In the Java world you would use update sites to perform the task and load the plug-ins automatically on start (server and client). No fiddling with the physical directories on the disk of computers where you deploy the code.
Follow these steps to deliver a JAR file using an Eclipse update site on the IBM Domino/XWork server and in IBM Notes/Domino Designer. For the purpose of this article I want to provide Apache Commons Lang as a plug-in. I have downloaded the latest binary version, unpacked it, and now I want to distribute the jar file with the binaries along with the javadocs to be used in my applications.
Steps we need to perform
- Build the local update site with the plug-ins as features in Eclipse
- Import the local update site into the Domino update site database
- Deploy the update site database to a Domino server and Domino Designer
This article will describe the first part of the job, building the local update site with the JAR file. In the second article I will show how to deploy the local update site to IBM Domino/XWork server and IBM Notes/Domino Designer. In the third article I will discuss some security issues and how to work around them. This article is already way too long - now I have warned you!
Build the local update site in Eclipse
This task consists of three steps:
- Create a new plug-in project from existing JAR files:
- Create a new feature project to "contain" the plug-in project
- Create a new update site project to "contain" the feature project
This can seem a little overwhelming but that is the way you have to do it. Feel free to delete the feature and update site projectes if you think they "clutter" your workspace - they are easily re-created if you need to update your plug-in. This guide on Creating an XPages Library by Maire Kehoe is your most important source for how to do this.
To make sure we have access to all the plug-ins and the Notes environment when we develop this code, we are going to use Domino Designer. We are just going to use the "Java" perspective which you open by selecting "Window / Open Perspective / Java".
Create the plug-in project(s)
First, we need to add the jar file(s) to a plug-in project. Then we will need to prepare the plug-in project to be installed as a library so we can "enable" it (in the Xsp Properties) for the applications we want to use it in.
1. Create a new plugin project from existing JAR files (right-click / select New / Other... and type "plug"):

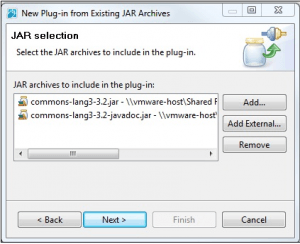
2. Next - include external JARs
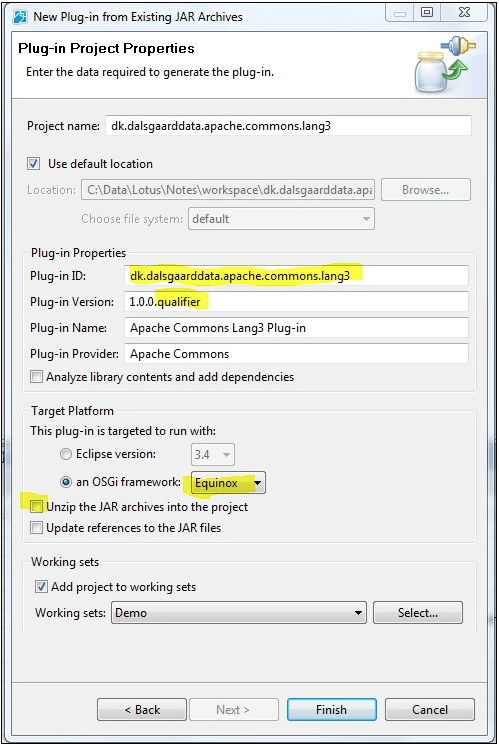
3. Name the project using a fully qualified name. Specify the plug-in version (I selected the version of the JAR - append ".qualifier" to get a timestamp and target as the OSGi framework (Equinox). I also deselected "Unzip the JAR archives into the project" and finally you may select a working set to organize the projects:
A note on naming your projects/plug-ins:
If you want to ensure that the name of the plug-in does not conflict with other plug-ins. Therefore, I will recommend that you use your on domain/company name as I have done in this example. I did first create the plugin calling it "org.apache.commons.lang" - it works, but you are better off using an identifier that you control
Click "Finish" and now the system will ask you whether you want to switch to the Plug-in Perspective:
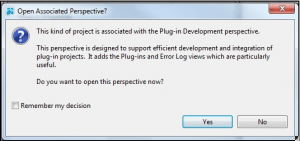
You do not have to do this (I don't) so you can just press "No".
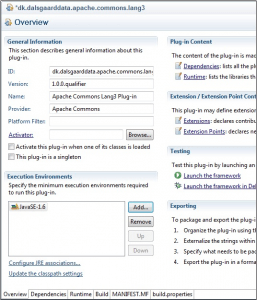
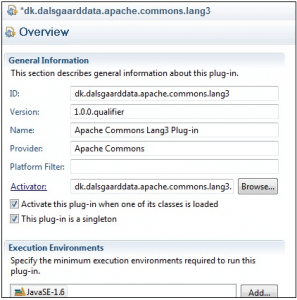
Now you need to configure a couple of options on the project and create a small bit of Java code to make the plug-in visible to your XPage/OSGi frameworks. Most of this will be handled in the editor for the MANIFEST.MF file in the META-INF folder of your project. So when I later refer to the "Overview" this is just the editor holding the MANIFEST.MF file.
4. First you set the Execution Environment to JavaSE-1.6. This includes the Extension Library which has some classes we need to finish the job:
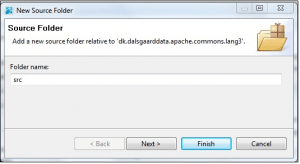
5. Right-click on the the project name in the outline and select "Build Path / New Source folder..." and give it the name "src":
6. Press "Finish" and then right-click on "src" and select "New / Other..." and find "Package" and give it the name you have given the project:

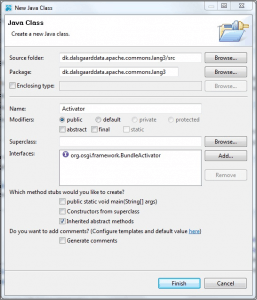
7. Now back to the "Overview" where you create an Activator by clicking on the link under "General Information" (make sure the package name is the one you just created - you can press [Browse...] to easily select it). Name the class "Activator":
8. Now there is a compilation problem with the Activator. Click in the left side on icon marking the first error:
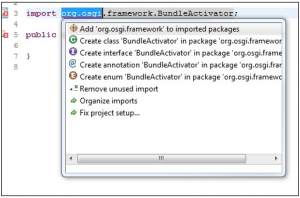
... and select the first option to add "org.osgi.framework" to the imported packages.
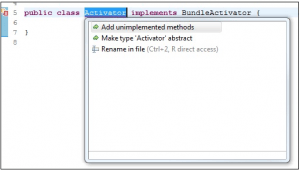
9. Click on the next error and select the first option to "Add unimplemented methods":
10. Finally add a line to give you the plug-in id in a single place (just below the "public class Activator..." definition):
public static final String PLUGIN_ID = Activator.class.getPackage().getName();
Save the Activator class.
11. Now back to the "Overview" where you select to "Activate this plug-in when one of its classes is loaded" - this is lazy loading and - and "This plug-in is a singleton":
12. Then you switch to the "Dependencies" tab and select "Add" under "Required Plug-ins". Start typing "com.ibm.xsp" and select "com.ibm.xsp.core"

Save your project, i.e. the MANIFEST.MF file (where you see "Overview") for the build path to be updated - otherwise the next step will not find the super class when you type the start of the name...
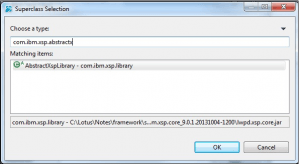
13. Right-click on the package under "src" and select "New / Class". Name the class "XspLibrary". Select "Superclass" and start typing "com.ibm.xsp.abstractx" and select the class "AbstractXspLibrary":
14. Click Ok to select the super class and complete the definition of the class:
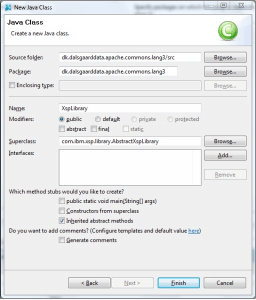
15. Click "Finish" to open the class for editing. I suggest you add a few lines to the XspLibrary class:
package dk.dalsgaarddata.apache.commons.lang3;
import com.ibm.xsp.library.AbstractXspLibrary;
public class XspLibrary extends AbstractXspLibrary {
public static final String LIBRARY_ID = XspLibrary.class.getName();
public XspLibrary() {
System.out.println("Loading Apache Commons Lang3 (" + getPluginId() + ")");
}
@Override
public String getPluginId() {
return Activator.PLUGIN_ID;
}
public String getLibraryId() {
return LIBRARY_ID;
}
}
The "System.out.println(...)" line in the constructor will print to the server console once the library is loaded by the OSGi framework. This can be handy - and at least nice to know. The string returned by the "getLibraryId()" method is the text that will be shown in the Xsp properties in your NSF database when you need to enable the plug-in later on.
16. Now we need to contribute this plug-in as an extension. In the "Overview" you select the tab "Dependencies" and add another required plug-in called "com.ibm.commons". You wan to make sure that this plug-in is moved up over "com.ibm.xsp.core" (by using the "Up"/"Down" buttons):

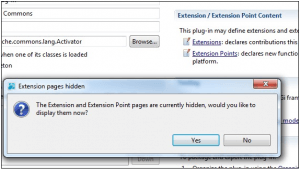
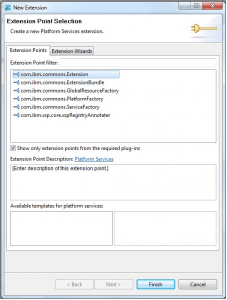
17. Now back to the "Overview" where you select the "Extensions" link on the right side. Confirm that you want to display the extensions and extension points:
18. Then add an extension "com.ibm.commons.Extension":
19. and mark the "(service)" under the com.ibm.commons.Extension when you are back on the Extensions tab. Then enter in the fields on the right (under "Extension Element Details"):
type: com.ibm.xsp.Library
class: (full name of your XspLibrary class)
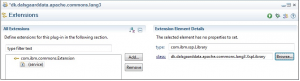
Note that this information is saved in a file named "plugin.xml" (though you do not have to bother with that since it is also edited through the "Overview").
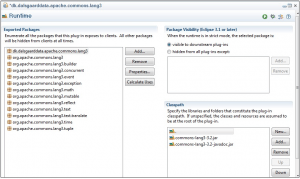
There is a very important last step. Since we added a source directory and some code that we need the outside world to see, we have to add a "." to our classpath - otherwise the XspLibrary will not be visible outside the plug-in project - and then it will not show up in the Xsp properties of an NSF (effectively making it useless since it can never be enabled....).
Remember to add your package as an exported package - otherwise you will not be able to use it from your code (which was the whole idea of this exercise). You do not need to do this if you specified a package name that already existed in the jar(s) you added (but you shouldn't use this approach). In our example I selected my own package name and therefore need to add the "dk.dalsgaarddata.apache.commons.lang3" package.
20. Go to the "Runtime" tab and add a "New" to the classpath, enter a "." (dot - without the quotes) and move it to the front using the "Up" button - and add your package name:
21. The final thing is to update the class path for the plug-in (that will get rid of a warning that you may have seen and make sure the plug-in is ready). On the "Overview" tab select the link "Update the classpath settings" at the bottom. Then you save the project:
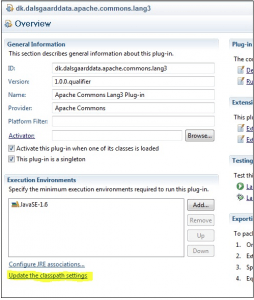
Finally, our plug-in project should be ready to be added to a feature etc.
Now we are ready to create a feature project
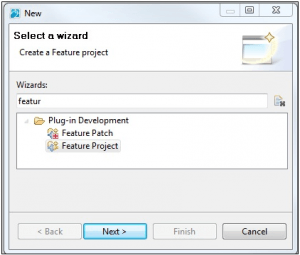
1. Right-click on a project and select "New / Other.... / Feature Project":
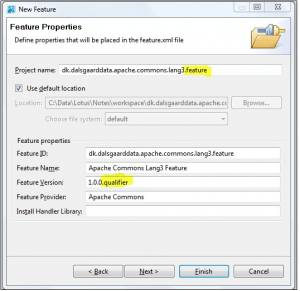
2. Next - give it a fully qualified name (I use the same as my plug-in project with ".feature" appended), feature name, version (remember to add ".qualifier" to the version name), etc.
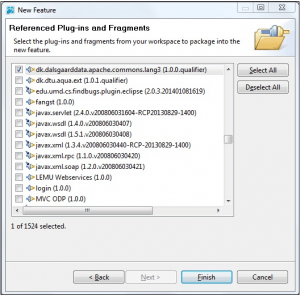
3. Select Next - and select the plug-in project(s) for the feature
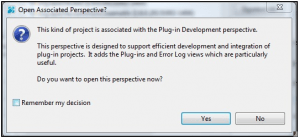
You may be asked to open an associated perspective. Press "No" for now. You will not need it:
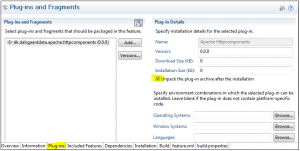
4. You then need to go to the "Plug-ins" tab of the feature.xml file. Here you have to specify that the plug-in should be unpacked after installation. This is important as Domino Designer cannot see the classes in the jar if you don't do this. The jar(s) will not be unpacked on the server - so no extra overhead there.
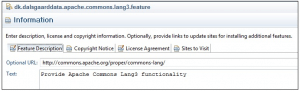
5. Now the feature is in. I recommend that you enter some information in the "Information" tab - though this is not strictly necessary. However, this is what others see when installing your plug-in:
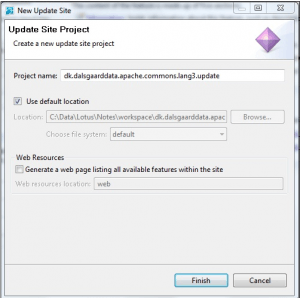
6. The final step is to create an update site project. You can do this directly from the Overview of the feature

7. Give the update site a meaningful name. I use the same approach as for the feature - just adding ".update" at the end:
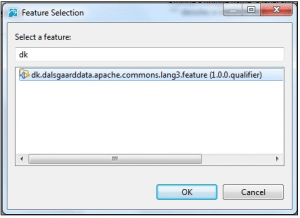
8. Now add a feature. You may want to add a category as well where you can put the feature under. This makes really good sense if your plug-in will be added to an update site databse with more features. Here I add a category (the "name" is what users will see - do not use spaces):
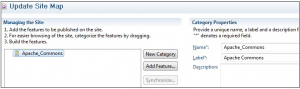
9. Select the category and press "Add Feature..."
10. Now the sites.xml of the update site is almost ready....
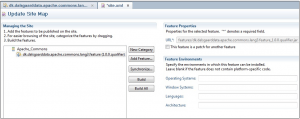
11. ... but very importantly, you need to "Build all" to generate the update site...!! This will create the "plugins" and "features" directories and populate them with the relevant information:
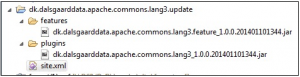
If you later need to re-build the update (say if you made some changes to your plug-in project) then you should delete these two folders with their content to avoid having several versions of the same plug-in/feature in the update site.
Working sets
If you do not see the feature and update projects in your working set you just have to select the "window menu" (the three horisontal bars) and "Deselect Working Set"
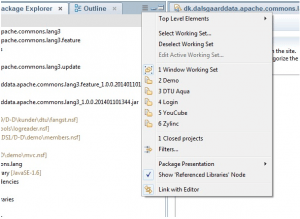
Then you can find your project, right-click on it, select "Assign Working Sets..." and add it to the working set where you created your plug-in project.
Now, you are ready to use your update site in Domino and Domino Designer.
Happy coding!
Update - 2014.09.26
It has come to my attention that my own environment cheated a little upon me. To make sure that you can use the plugin in other Domino Designers than the one having the plug-in, feature and update site projects installed, you need to unpack the plug-in after installation. I have added this to the creation of the feature project as a new item 3.
Thanks to Cameron Gregor for pointing out (see this article on StackOverflow), Serdar Başeğmez for testing and Declan Sciolla-Lynch for explaining the details.
/John
Blog