
Deploy an Eclipse update site to IBM Domino and IBM Domino Designer
This article is the second using third party JAR files as plug-ins in your Domino environment. See the first article about wrapping an existing JAR file into a plug-in and the third article about security and permissions.
To recap: Now you have your own Eclipse update site (as we built in the previous article) - or you could have downloaded another Eclipse update site. The steps to deploy them are the same!
I will continue using the example from the first article where we want to provide Apache Commons Lang as a plug-in for our applications.
Steps we need to perform
- Build the local update site with the plug-ins as features in Eclipse (done in the first article)
- Import the local update site into the Domino update site database
- Deploy the update site database to a Domino server and Domino Designer
This article will describe the second two parts of job, importing the local update site and deploying it to a Domino Server and Domino Designer.
Import the local update site into a Domino update site database
We need to create database to "hold" the Eclipse update site (also called "local update site") in the Domino infrastructure. This is a database that can be replicated between servers as any normal Domino database.
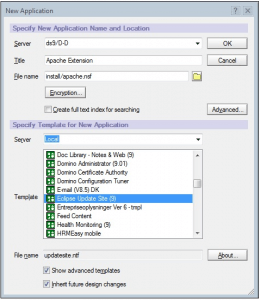
1. Press [Ctrl] + N (or select File / Application / New...).
2. Then check the "Show advanced templates" and find the "Eclipse Update Site (9)"
3. Give the update site a name and a title and press [Ok]
I have developed the habit of putting my update sites in a single directory. I find that gives a good overview - but you don't have to.
Now, the update site is ready for us to use for distributing our local update site with the plug-in. If you haven't already done so, open the update site database
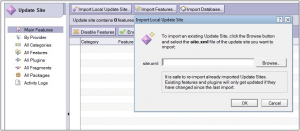
4. Select to import a local update site:
5. Navigate down to the site.xml file in the Eclipse update site project and import it:
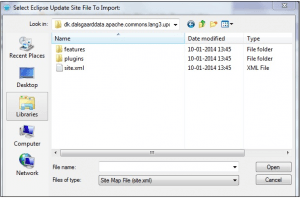
If you put the local update site project in the “default” location then you will find it under the “workspace” folder in your Notes data directory.
And now you have imported the feature:
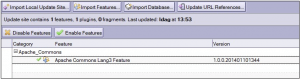
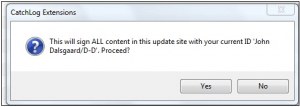
6. Finally, you should sign all the content in the update site database by selecting “Actions / Sign all content” and press “Yes” to the following confirmation dialogue:
Now we are ready to use our new plug-in in the Domino environment
Deploy the update site database to a Domino server and Domino Designer
This task consists of two steps:
- Configure Domino to use an update site
- Configure Notes/Domino Designer to use an update site
First, let's configure Domino - and after that, we will configure Domino Designer to use the plug-in
Configure Domino to use an update site
This is simply controlled by setting a variable in notes.ini called: OSGI_HTTP_DYNAMIC_BUNDLES
You can enter more than one update site separated by commas. However, there need to be an update site with the name(s) specified in this variable
when you start the server or it will throw an error.
Go to your Domino Directory on the server and open configurations. If you do not already have a configuration document for the server in question you
need to create one.
1. Open the configuration and select "NOTES.INI Settings"
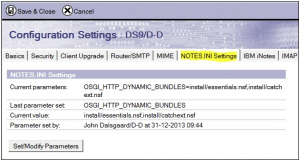
2. Select Set/Modify Parameters and enter the name of the variable:
OSGI_HTTP_DYNAMIC_BUNDLES (it is NOT present in the list – but typing it in works fine)
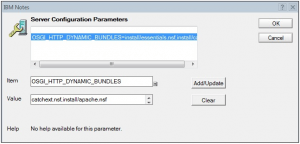
and press “Add/Update” for the variable to be changed and save the configuration settings document.
3. Now restart the server for the changes to take effect (you need to restart the server when you have changed the list of update sites).
[18210:00002-1956095776] 10-01-2014 11:54:14 JVM: Java Virtual Machine initialized.
[18210:00002-1956095776] 10-01-2014 11:54:14 HTTP Server: Java Virtual Machine loaded
[18210:00002-1956095776] 10-01-2014 11:54:14.75 CSRF Init: iNotes_WA_Security_ReturnUrlCheck> c_CSRFReturnUrlCheck: 1
[18210:00002-1956095776] iNotes Init: Credential Store Configuration not enabled, less secure mode
[18210:00002-1956095776] 10-01-2014 11:54:16 HTTP JVM: CLFAD0330I: NSF Based plugins are being installed in the OSGi runtime. For more information please consult the log
[18210:00002-1956095776] 10-01-2014 11:54:26 XSP Command Manager initialized
[18210:00002-1956095776] 10-01-2014 11:54:26 HTTP Server: Started
Notice the “… NSF Based plugins are being installed in the OSGi runtime…” message. To see what has been installed you can type the command “tell http osgi ss” and it will show you the entire list of all plug-ins loaded. Typically, you will want to filter this a bit. This is simple – you just append the start of the full name of the plugin… Say, if I want to show just the plugins beginning with “dk” I would write:
te http osgi ss dk
[22997:00002-3437475616] 10-01-2014 13:55:22 Framework is launched.
[22997:00002-3437475616] 10-01-2014 13:55:22 id State Bundle
[22997:00002-3437475616] 10-01-2014 13:55:22 13 <<LAZY>> dk.dalsgaarddata.apache.commons.lang3_1.0.0.201401101344
[22997:00002-3437475616] 10-01-2014 13:55:22 22 <<LAZY>> dk.dtu.aqua.ext_1.0.1.201401021840
That’s it! Now these plug-ins are ready to be used on the server. Please do remember to remove them from the jvm/lib/ext library if you (like me) already had them deployed that way….
If you later change/update the plug-ins then you will have to restart http on the server for them to become effective. On the server console type: “restart task http” (if you just use “tell http restart” you will NOT have the OSGi bundles re-loaded)
Configure Notes/Domino Designer to use an update site
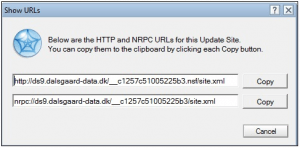
The best way to achieve the update is by using a “provisioning widget”. But first you want to copy the url to the update site to the clipboard.
1. Open the update site database and select “Actions / Show Urls…”:
4. Paste the url into the field and press the “Load” button.
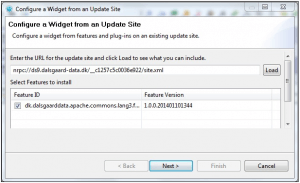
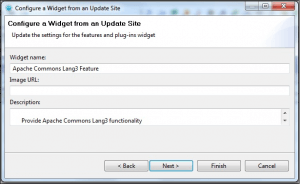
5. Select the feature(s) and press “Next”. Then provide a meaningful name and a description and press “Finish” (or leave what was set in the feature project)
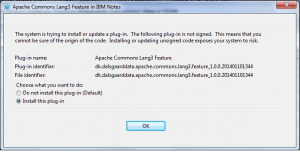
6. Then confirm that you want to install the plug-in:
7. Finally, Notes needs to be restarted for the plug-in to become effective

And you are ready to use your plug-in in Designer.
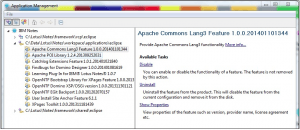
Once you have restarted Notes you can check what plug-ins have been installed. Select File / Application / Application Management – and expand the Notes\workspace\applications\eclipse section (typically the second) and there your feature should be shown.
You can now start using the functionality in a database. Open a database in Domino Designer and select the Xsp Properties (available at the bottom of the outline under “Application Configuration” if you have opened the XPages or Domino Designer perspective). Select the “Page Generation” tab:
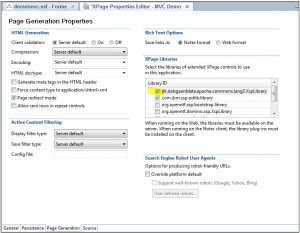
and tick the new plug-in to enable it and save the properties.
Now create a Java class and use the functions of Apache Commons Lang3:
package dk.dalsgaarddata.demo;
import org.apache.commons.lang3.StringUtils;;
public class Test {
public void capitalize(String x) {
System.out.println(StringUtils.capitalize("great"));
}
}
Deploying plug-ins through the use of widgets makes it incredibly easy to distribute the plug-ins to your developers (or Notes users) by using the standard features to deploy widgets - either through sending an email with the widget or by using policies.
Happy coding!
References
The XPages Extensibility API Developers Guide: http://www-10.lotus.com/ldd/ddwiki.nsf/dx/Master_Table_of_Contents_for_XPages_Extensibility_APIs_Developer_Guide
Background on plug-ins, features and update sites on Domino: http://yaport.pro/samples/sandbox.nsf/ByDateNJ/404B644224E898DA8525729F0060277B/$FILE/ID211.pdf?OpenElement
How to build an update site: http://wiki.eclipse.org/Create_and_Export_MySQL_JDBC_driver_bundle
How to deploy updates on Domino: http://www-10.lotus.com/ldd/ddwiki.nsf/xpAPIViewer.xsp?lookupName=XPages+Extensibility+API#action=openDocument&res_title=XPages_Extension_Library_Deployment&content=apicontent
How to install plug-ins via widgets into Notes/Domino Designer: http://www.openntf.org/blogs/openntf.nsf/d6plinks/CGUN-9DMR6W (from 12:00 and the next 6-7 minutes)
Blog